Another set of our Let’s Play Videos to keep up to date with. Is it weird to watch and enjoy your own Let’s Play? I’m really enjoying this one so far. Here’s 15 to 21.
Let’s Play Final Fantasy XIII – Part 5
Another set of our still running Final Fantasy Let’s Play, episodes 29 to 35. Look for then after the cut.
GlossyBox Drawers
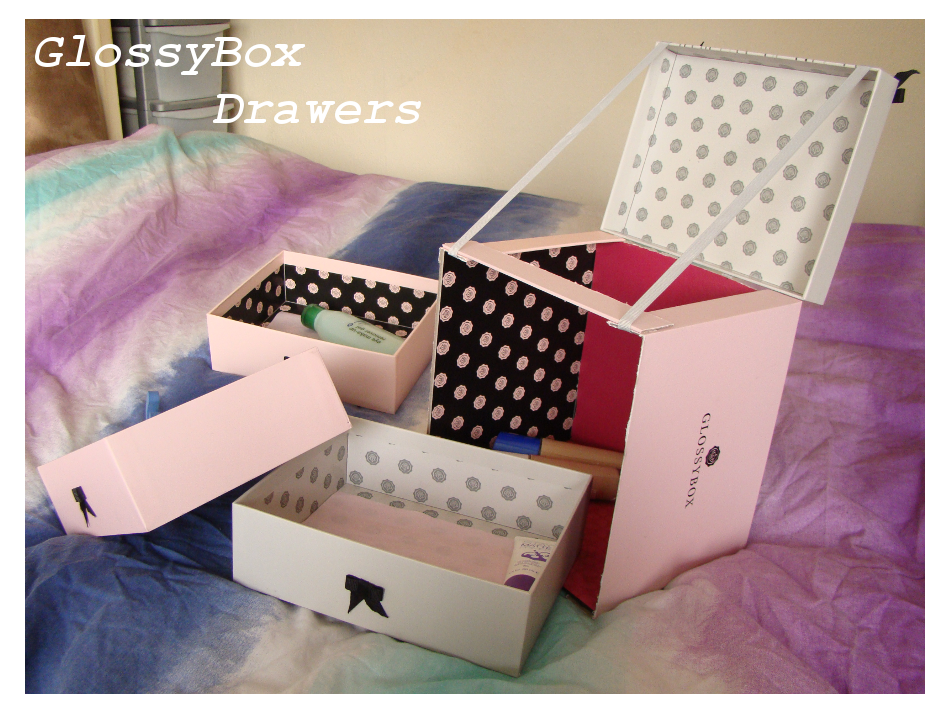
After having a GlossyBox subscription for a while, I’ve found what I assume most people with this type of subscription find – I have a lot of boxes. For the most part, my seven boxes have been majoritively limited edition prints, or that one which is a different size. But a while ago I finally got a few that I could turn into GlossyBox Drawers.
 This is a very popular thing to do with old GlossyBoxes as far as I can tell, and I can see why. They do end up looking quite nice, but they’re not 100% as functional as I’d perhaps like – but I’ll get to that.
I have two links to give credit to: Janet Su’s 2012 Re-using GlossyBox-es post, which is the earliest post of this type that I could find. Her tutorial uses 4 boxes to complete the whole set of drawers.
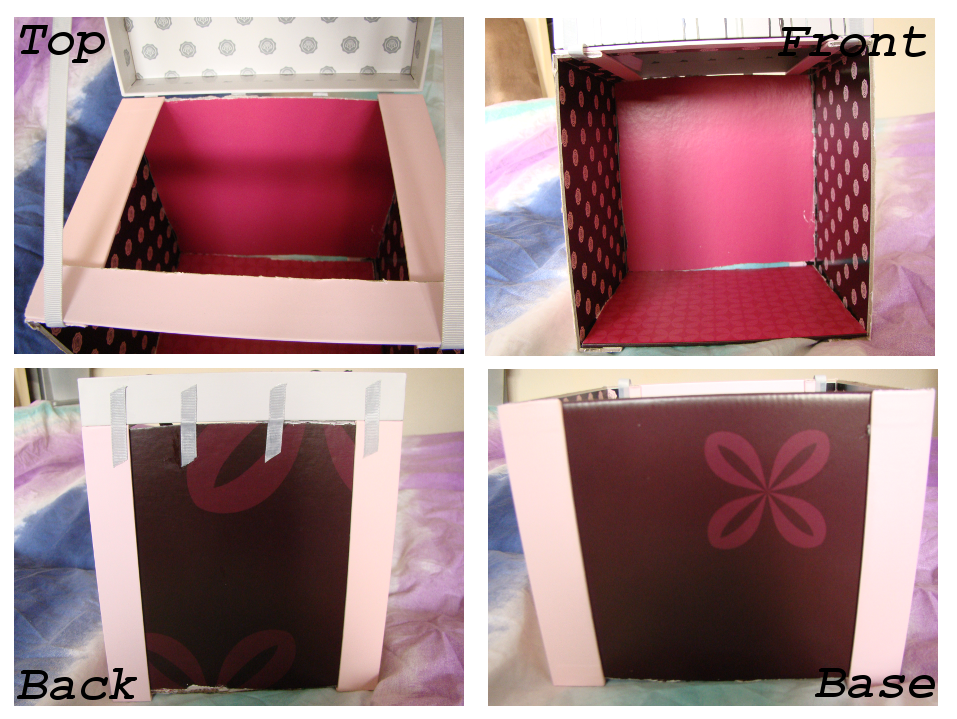
The one I based my drawers on more is Gerry Leanne 2014 version, DIY: GlossyBox Drawers. Her version actually only uses 3 drawers, and additional cardboard for the back and base that you don’t see – which is quite neat if you have a smaller number of matching boxes, or just want to use less of them.
 Understanding the construction is pretty simple, the base rectangle piece has to be the same size as a GlossyBox in length and width, so the drawers fit in snug and pretty. The back square panel has the same length sides as the longer measurement of a GlossyBox.
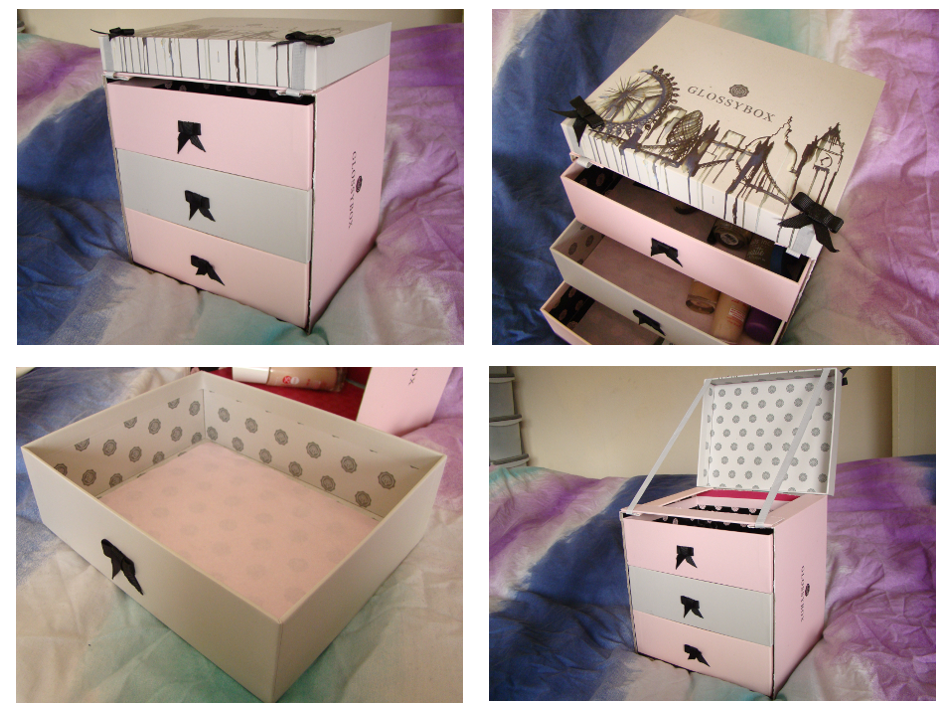
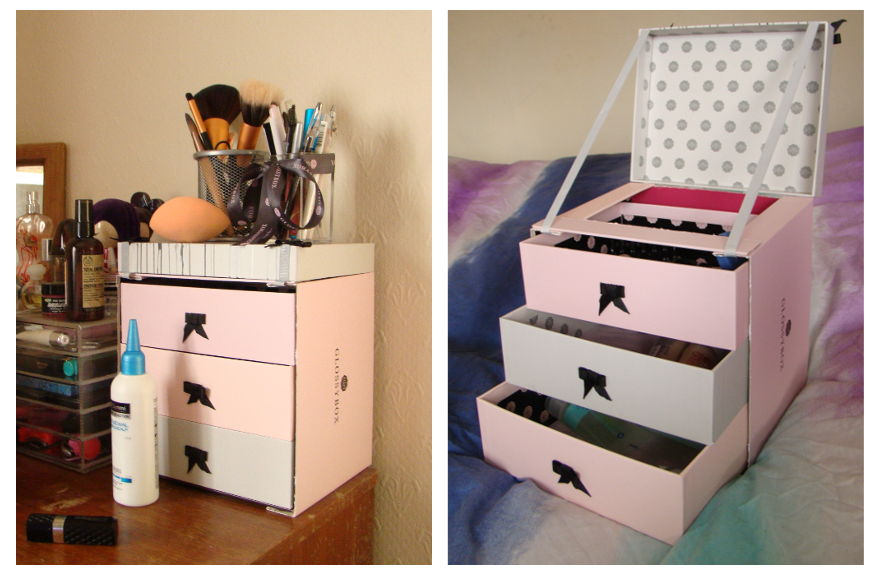
I only found the base and back panel parts fiddly to cut out, as the cardboard I used was a bit thicker than the GlossyBox. The inside colour matches the boxes quite well, and the back isn’t visible when you put the drawers where you use them. Cutting the sides from the GlossyBoxes themselves is very easy. I used a single long cut off from one as a sort of bridge on the top part of the drawers, so they were held together nice and snug. Other than that construction is very simple, and easy to do in a few hours. Glue it all together, and glue any decorations you want on. I added paper cut outs to the bottom of each drawer, cut from GlossyBox paper, as kind of drawer protectors, as well as ribbon like most other versions I’ve seen. The boxes I used were two plain pink ones, and the Karen Millen box from September 2014 since I really liked the lid.
 Now to pretty much the big downside of making these boxes. They are much prettier than they are functional, to be honest. Without drawer runners/separators they don’t run out smoothly, and if you weight down a drawer it can just fall into the one below, since the GlossyBox cardboard isn’t that solid or thick to keep them from moving around really. You could possibly change the design to do something about this – a supportive enough divide between each drawer would do it. Otherwise, the drawers are usable if you don’t overburden them and are careful opening and closing them. They do provide extra storage, and are a nice way to reuse these pretty boxes – they do look quite cute. You could just as easily use them as drawer dividers in an existing set of drawers.
 Just after this upcoming weekend we should have our first GlossyBox of 2015 – I’m looking forward to it. Until then.
Let’s Play Call of Cthulhu: Dark Corners of the Earth – Part 2
Another lovely week of our horror Let’s Play Call of Cthulhu, running along side our Final Fantasy Let’s Play – this is episodes 8 to 14. Enjoy after the cut.
Let’s Play Final Fantasy XIII – Part 4
Episodes 22 to 28 of our still ongoing Final Fantasy XIII Let’s Play.